Lenovo M1210 12G PCI-E X4 SAS Controller
I have managed to source a couple of Dell SAS SSDs but as a regular consumer I could not get it connected to my ASRock Z890 Pro-A. For SAS drives (SSD or HDD) you need a compatible Host Bus Adapter (HBA) and most of these adapters are PCI-E X8 while my motherboard has only one PCI-E X16 slot occupied by my GPU and a couple PCI-E X4 slots, one of which is occupied with a video capture card.
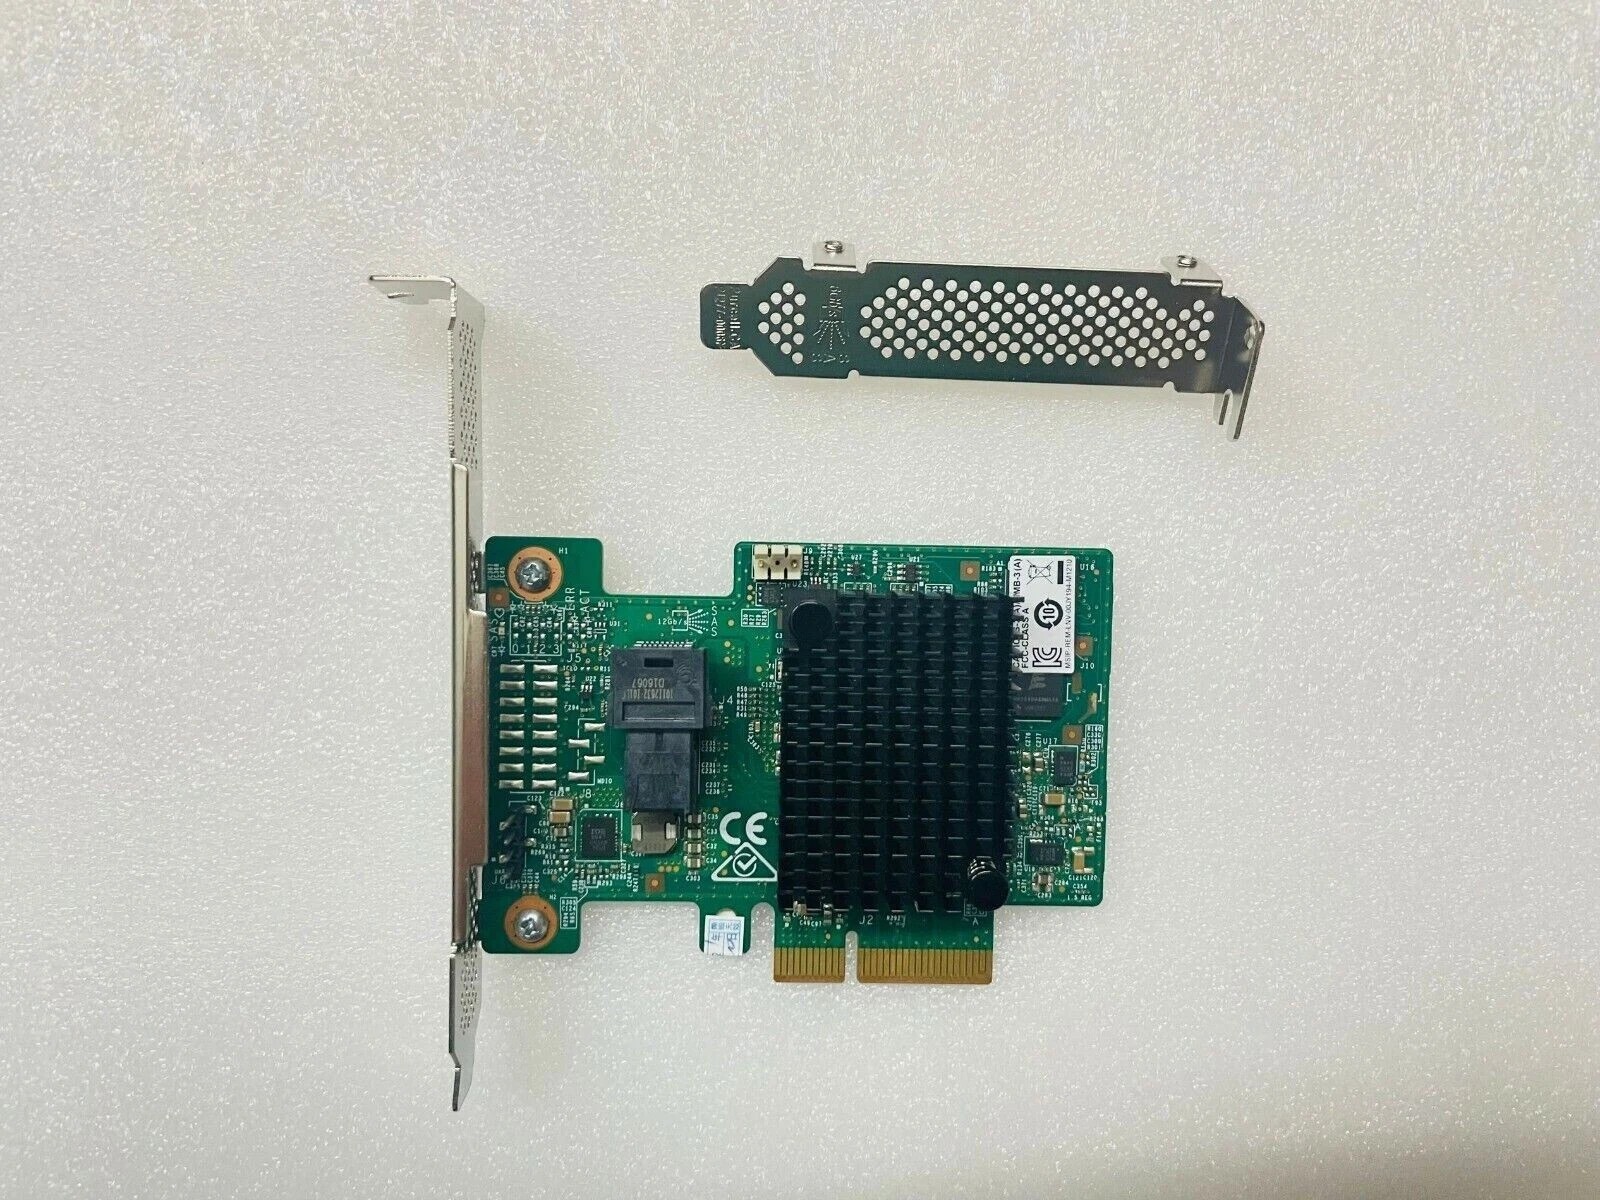
The only PCI-E X4 12G SAS HBA I was able to find is Lenovo ServeRAID M1210.
It comes with a single SFF-8643 connector unlike the PCI-E X8 cards that come with two SFF-8643 connectors. Still, each connector can host up to four drives, which is enough for me.
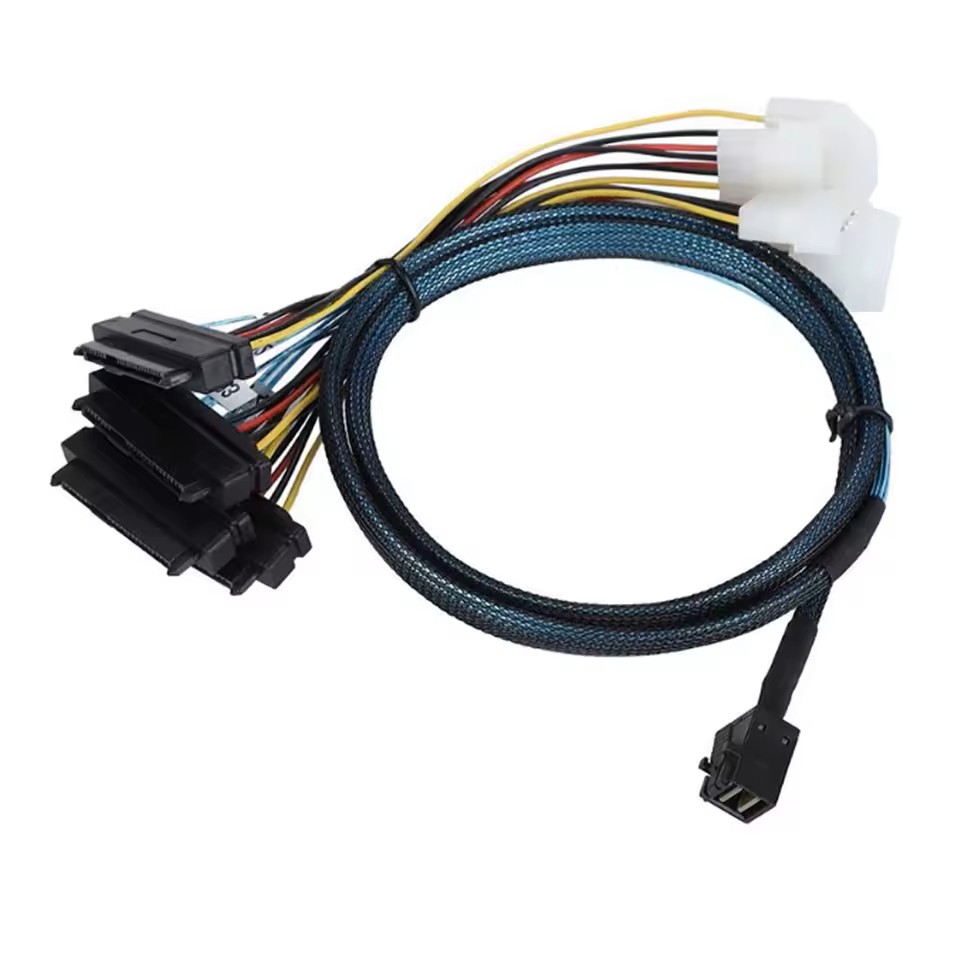
This is the cable I use with my M1210: Mini SAS HD SFF-8643 to 4 x SFF-8482.
Lenovo ServeRAID M1210
This is an OEM card equipped with LSI SAS3008 9300-4I controller and compatible with the official Broadcom firmware. Most of these cards are sold with proprietary Lenovo hardware RAID firmware that is of no use for regular consumers like me.
So, in this little guide I will show how to flash Lenovo M1210 to IT mode for usage in regular computers. Lenovo M1210 works with 9300-8i and 9300-4i firmware, I treid both but could not find any difference.
ℹ An HBA (Host Bus Adapter) in IT (Initiator Target) mode is a SAS/SATA controller flashed with firmware that allows it to act as a “dumb” pass-through device.
If you want to cross-flash from the original Lenovo firmware or between the 8i/4i versions, you have to erase Serial Boot Record (SBR) with MegaRec.exe first.
Otherwise flashing will fail with error like:
ERROR: NVDATA Image does not match Controller Device ID!
       Device ID - NVDATA:0x96 Controller:0x97
If you do not want to bother with cross-flashing then you can buy a ready to use Lenovo M1210 9300-4i in IT mode from the Art of Server on eBay.
UEFI Shell
Even though Lenovo M1210 can theoretically be flashed from Windows/DOS/Linux, using UEFI shell is the easiest way. Some motherboards have built-in EFI shell to boot from others require a bootable USB flash drive with UEFI shell.
If you motherboard does not have built-in UEFI shell then you can follow this guide to create a bootable USB drive: Building a Bootable USB drive with UEFI Shell (x64).
Firmware and tools
Regardless of UEFI shell, you would need a FAT32 formatted USB drive to host tools and firmware to flash the card. The files needed are:
9300_P1616_OOB_20210529.bin: the 8i firmware.SAS9300_4i_IT.bin: the 4i firmware.MegaRec.exe: DOS utility to completely erase SBR.sbrempty.bin: empty file to completely erase SBR.sas3flash.efi: the flashing tool.mptsas3.rom: optional BIOS file for legacy (CSM) boot.mpt3x64.rom: optional BIOS file for UEFI boot.
ℹ Most of the HBA cards have firmware and BIOS. Firmware is required for card’s operation. BIOS provides UI for configuration. In IT mode it’s recommended to skip the BIOS as no extra configuration is needed and the boot time is slightly faster without it.
All the files can be found online but also available to download from my blog:
Boot into UEFI shell
Place all the required files onto your FAT32 formatted USB flash drive, disconnect all other storage devices, and boot into UEFI shell.
Disconnecting other storage devices is not strictly necessarily but makes things easier as the USB flash drive will always get fs0 path.
I left my storage connected so the USB flash drive got path fs1; I also placed all the files into 9300 folder, that’s what you will see on the screenshots.
All the following EFI shell commands must be executed from the folder where you placed the files, in my case it’s fs1:\9300 in your case it can be fs0:\ or something else.
Ensure that M1210 is detected
Execute the following command to ensure that the Lenovo M1210 is properly detected.
sas3flash.efi -list
If the card is detected, you should see something like this:
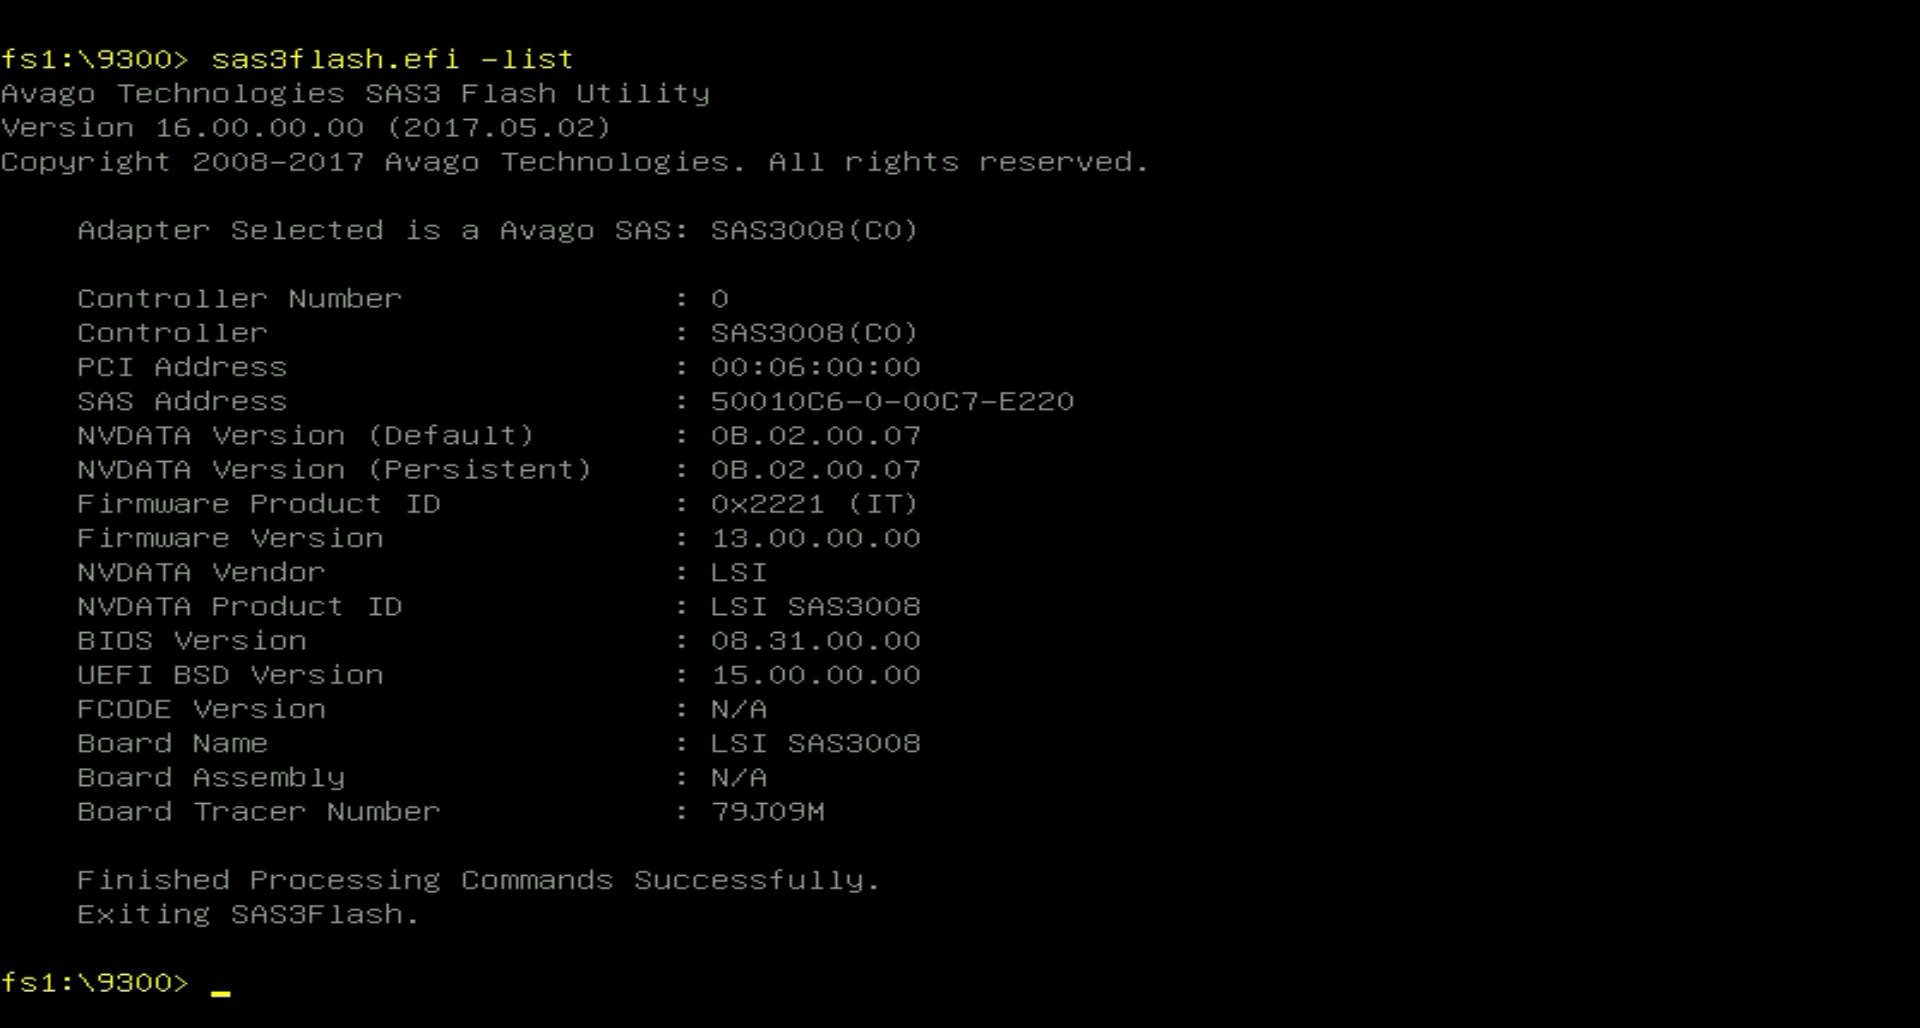
From here you should save the SAS Address, Board Assembly, and Board Tracer Number values.
I recommend writing all these values on a piece of paper and taking a photo of the screen.
Erase the M1210 without changing Device ID
❗ Do this step only if you plan to flash firmware with the same Device ID, for example if you want to upgrade from P13 to P16 version.
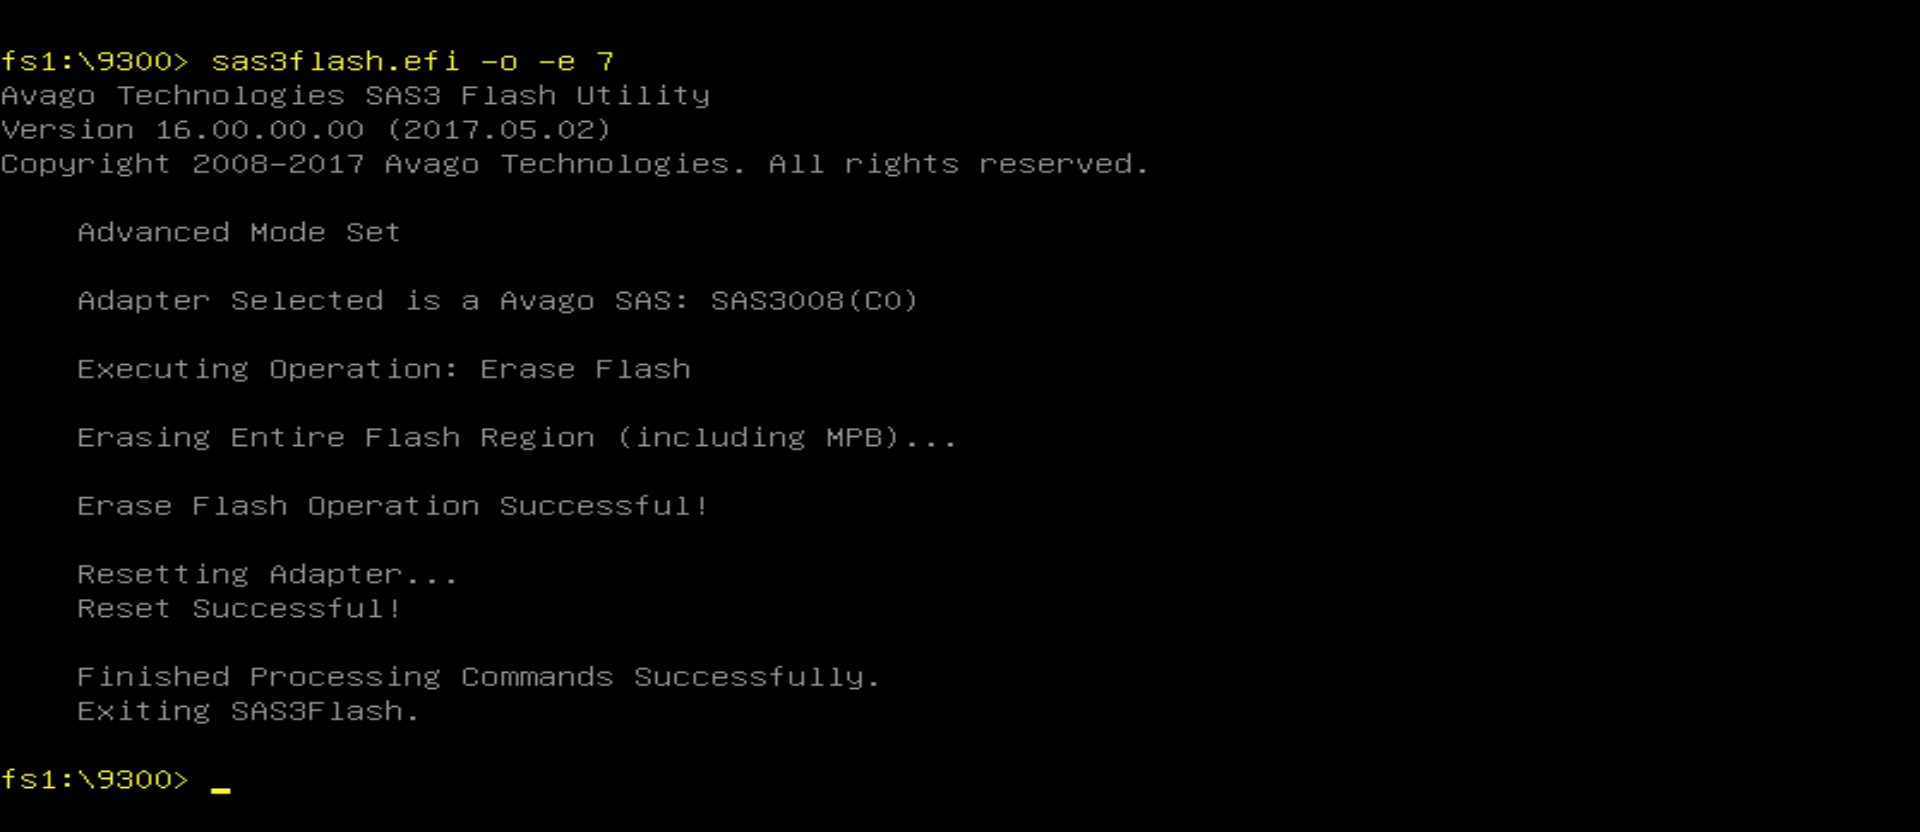
Before Lenovo M1210 can be flashed to IT mode it must be fully erased first. For that execute the following:
sas3flash.efi -o -e 7
The flashing procedure takes a while and does not show any progress, just wait patiently until it finishes.
Erase the M1210 for changing Device ID
❗ Do this step only if you are cross-flashing between different firmware versions, for example from 8i to 4i.
Unfortunately, the needed tool is only available as a DOS executable, so you would need a DOS bootable USB flash drive.
Creating a MS-DOS bootable flash drive.
ℹ The same USB flash drive can be DOS bootable in legacy (CSM) mode and EFI-Shell bootable in UEFI mode.
Once a DOS bootable USB flash drive is ready, copy MegaRec.exe and sbrempty.bin onto it then reboot into DOS.
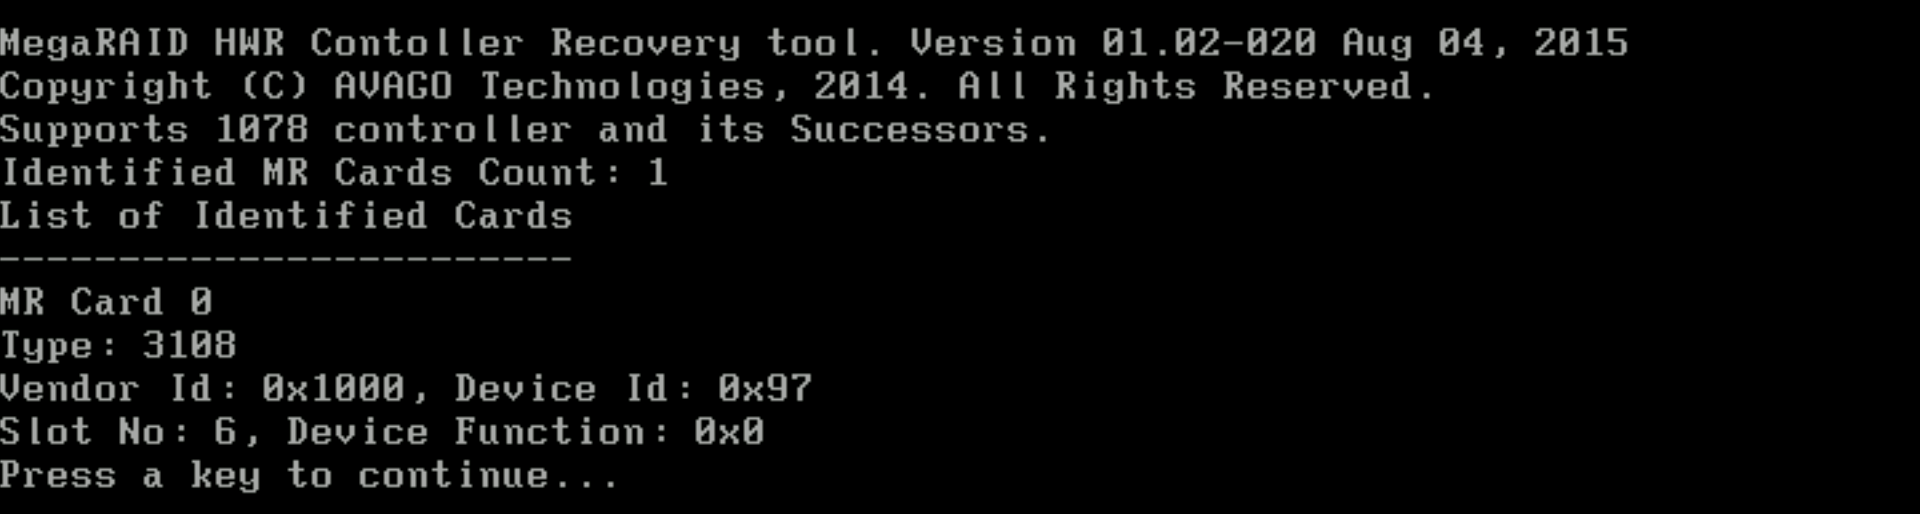
Check if the adapter is detected with:
megarec.exe -adpList
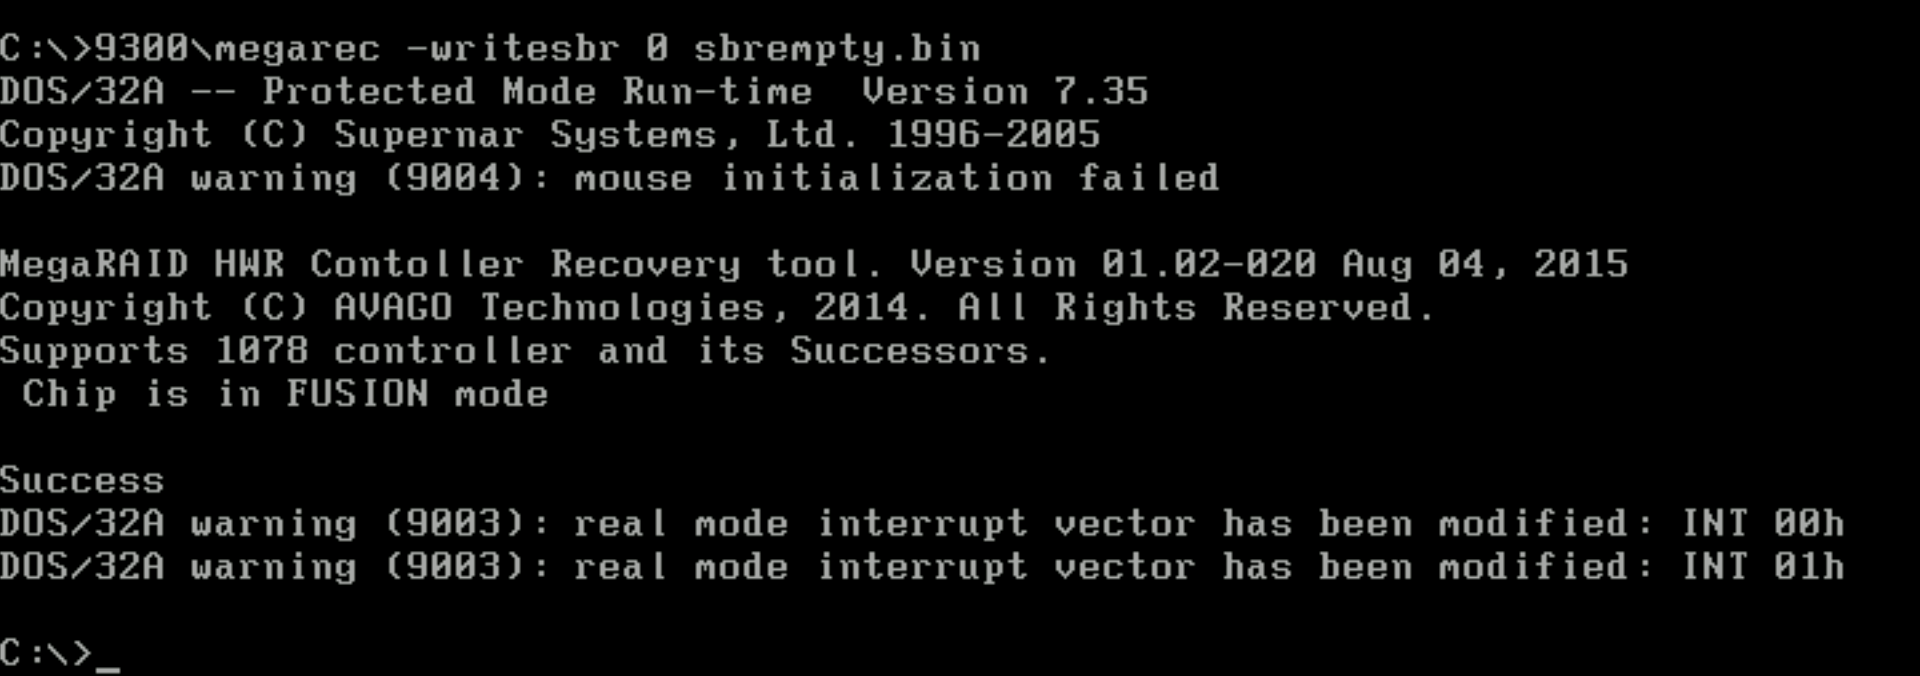
And then erase adapter’s SBR with:
megarec.exe -writesbr 0 sbrempty.bin
Now you can reboot back into the EFI shell and flash your shiny new firmware.
Flash the new firmware
Execute the following command to flash the new firmware, make sure to use the correct file name.
sas3flash.efi -o -f <file-name.bin>
In my case the full command looked like this:
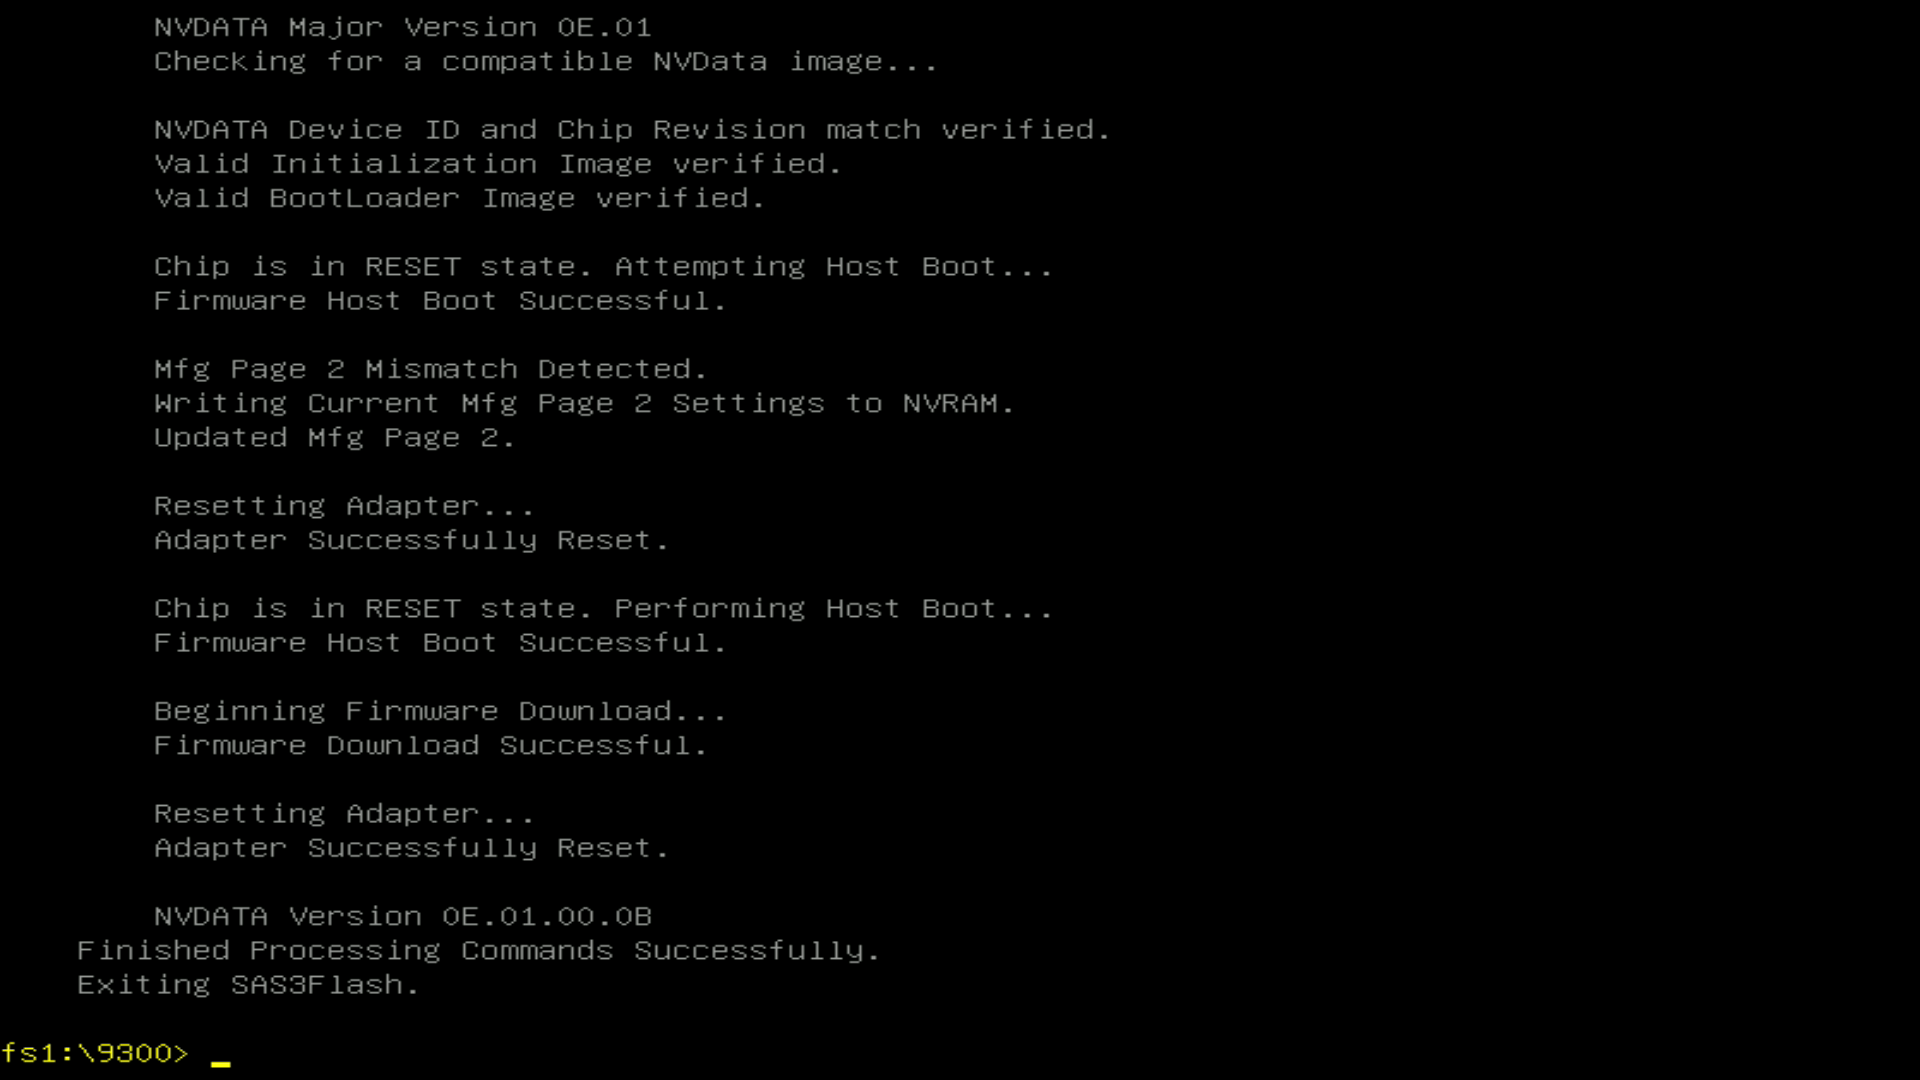
sas3flash.efi -o -f 9300_P1616_OOB_20210529.bin

It may take a while to finish the process but once ready you should see something like this:
Optionally flash the new BIOS
If you want to have the card’s UI then you have to also flash the new BIOS, it is done with the following command:
sas3flash.efi -o -b mptsas3.rom -b mpt3x64.rom
I skipped this step as I do not want the UI, instead I want slightly faster booting time.
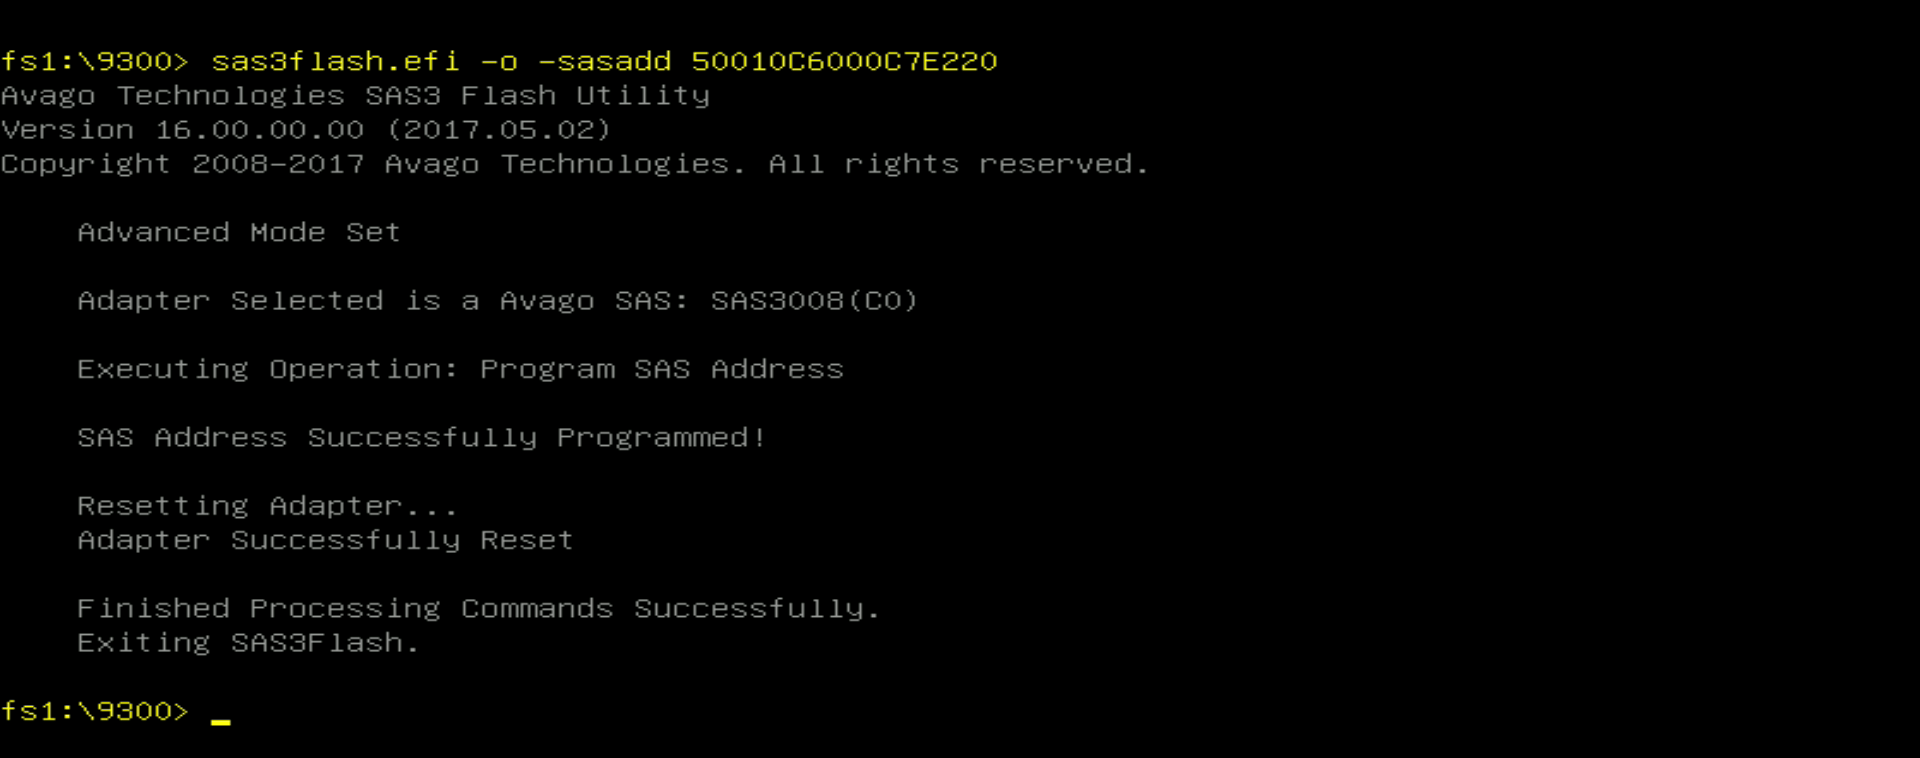
Restore SAS Address
Once flashing is completed you have to restore the original SAS Address of the card. It’s done with the following command:
sas3flash.efi -o -sasadd <original-sas-address>
In my case the command was:
sas3flash.efi -o -sasadd 50010C6000C7E220
Make sure to specify SAS Address without the dashes otherwise it will be rejected.
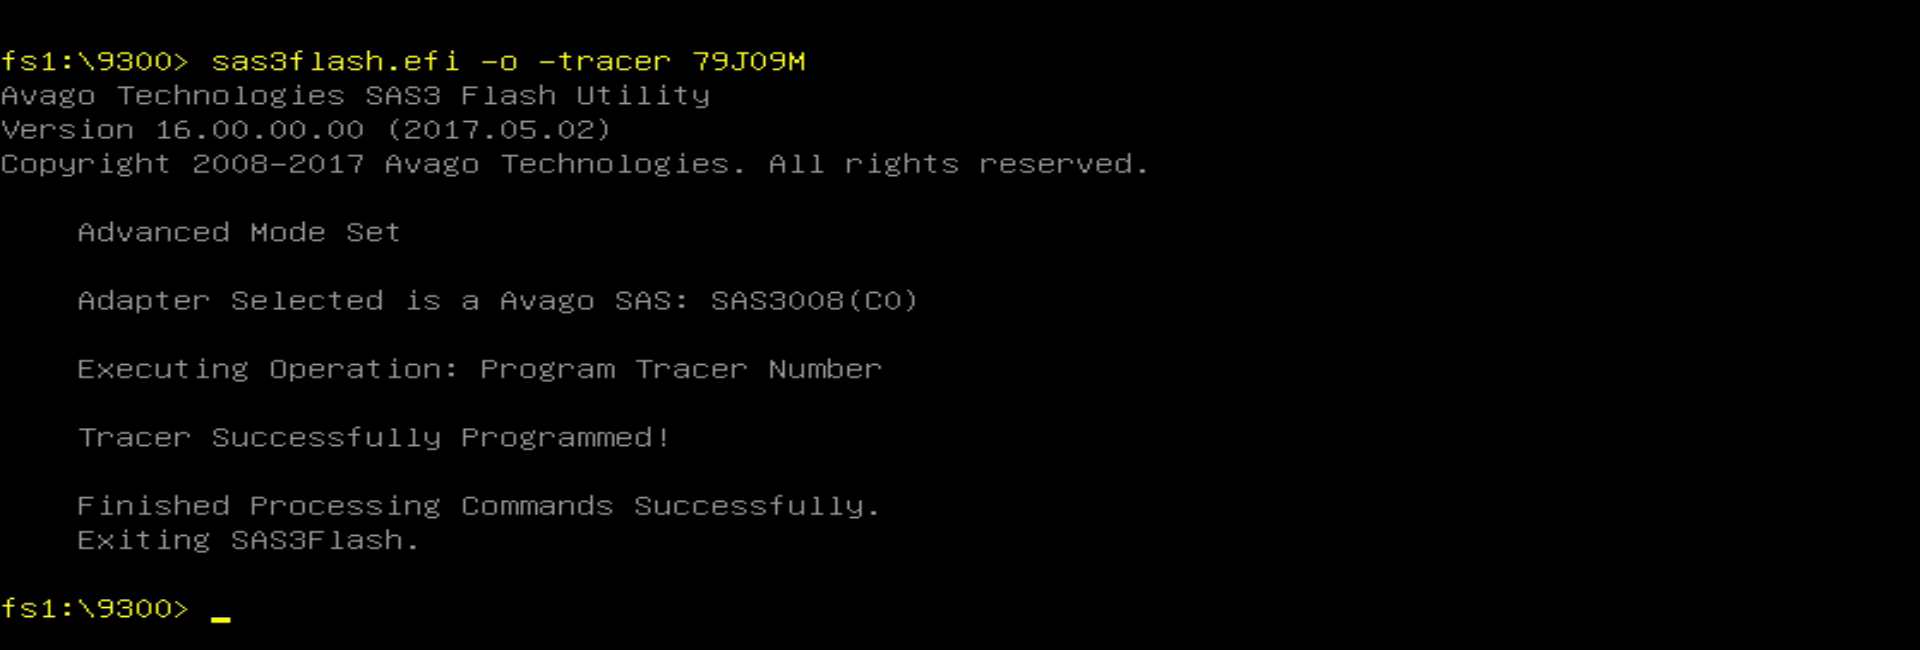
Do the same for the other two properties with (not required):
sas3flash.efi -o -assem <original-assembly-number>

sas3flash.efi -o -tracer <original-tracer-number>
Done
Now your Lenovo M1210 runs in IT mode and can be used as a simple SAS controller to connect SAS SSD/HDD drives.
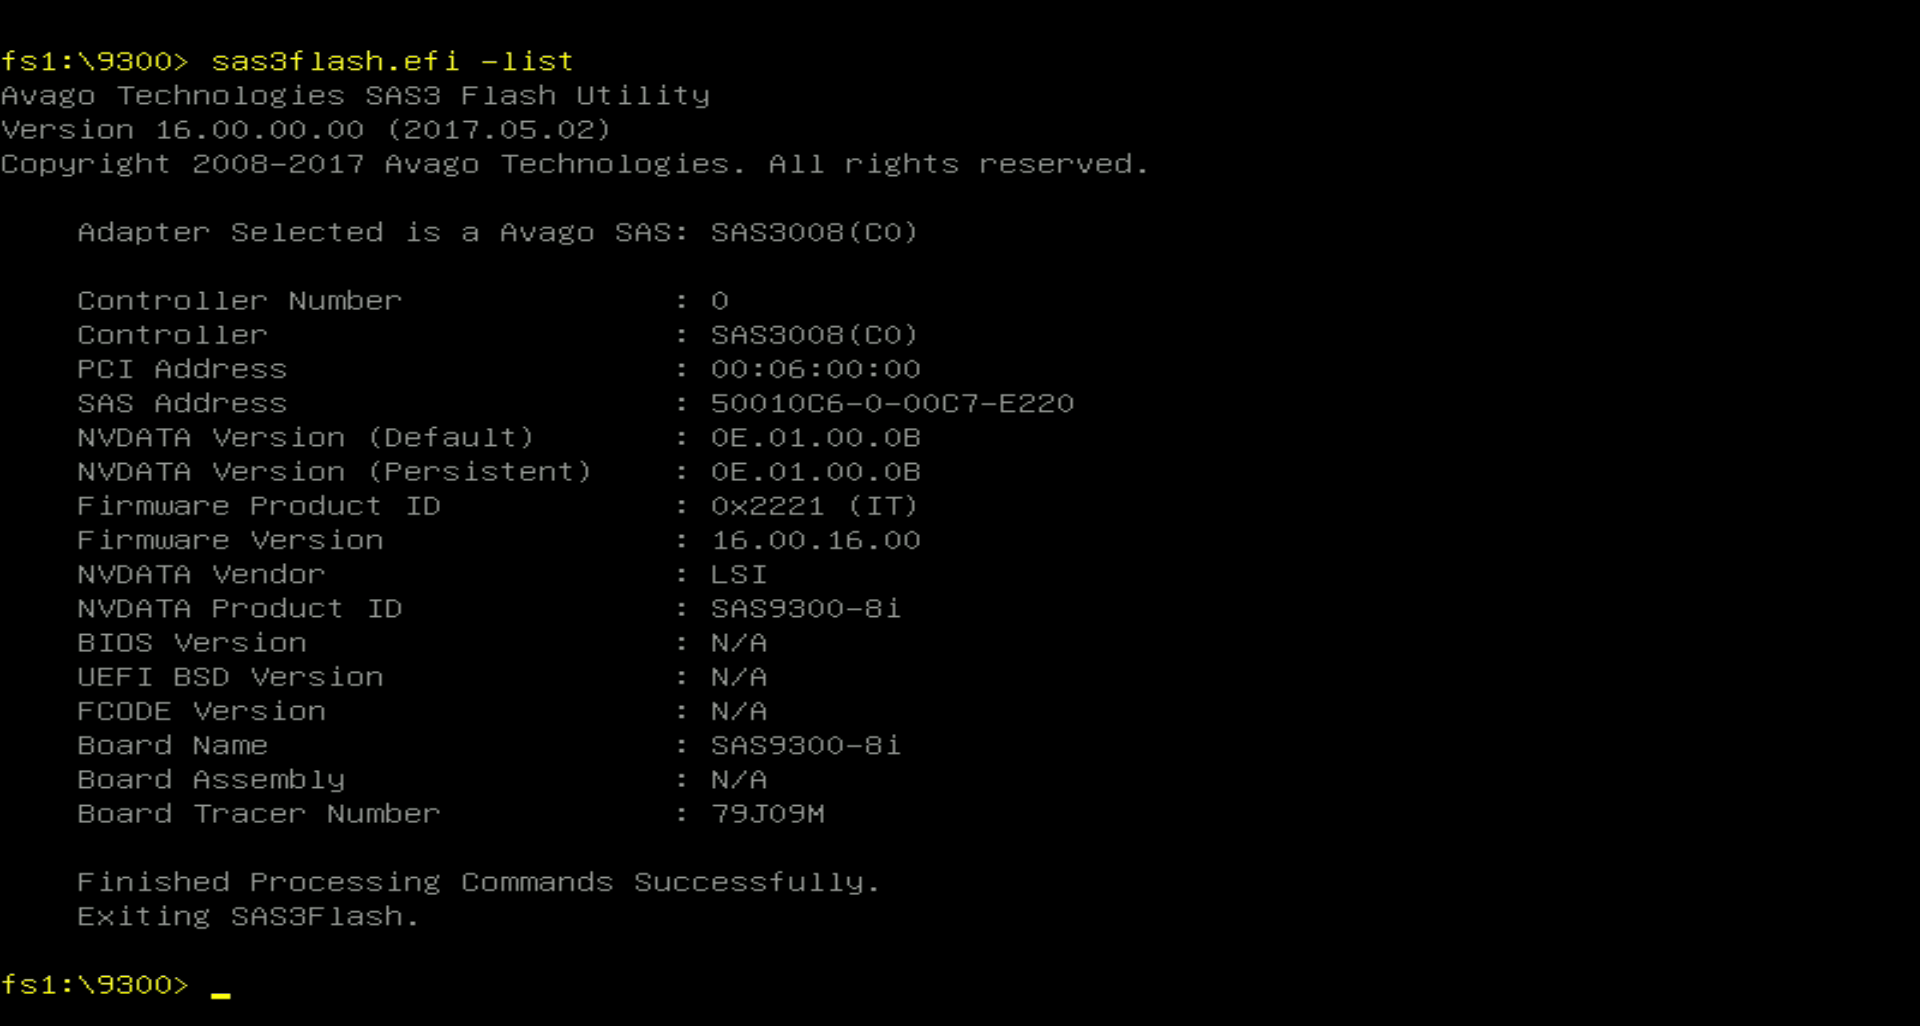
Execute the list command for one last time to see that firmware version is updated, SAS Address and other properties have correct values.
If you used my files, then the firmware version should be set to 16.00.16.00.